This is an easy sweet snack sold almost everywhere on the streets of Nigeria. It is so common and a favorite too. Nigerian buns is soft inside and crispy outside. It is especially delicious when eaten with your favourite soft drink. Follow this easy guide to make your ideal Nigerian buns in your own kitchen.
You Need:
250g flour
1tsp baking powder
1/2 cup sugar
Pinch of salt
50g margarine
100ml milk
1egg
Water
1litre oil(for deep frying) (Makes 10 buns)
Method
>Mix all dry ingredients together(flour, sugar, salt and baking powder)
>Rub in the margarine until it becomes like bread crumbs
>Add the egg and mix well
>Pour in the milk and mix until it forms a dough. Add water if the milk is not enough to form a firm and smooth dough. (Once it forms a dough stop, do not knead)
>Heat up the oil in a deep frying pan
>While the oil is heating, cut out the dough and roll within your palms into balls.
>Fry over medium heat until golden brown
>It’s ready
Enjoy with your favourite chilled soft drink. Voila!
I have shared previously a red-velvet cake recipe that is oil-based and I promised to share a butter-based recipe. This is it.
I have searched so long for a recipe that would give me that real ‘feeling’, if you’ll understand what I mean. That is not to say that the oil based recipe is not right; I love it, it’s my recipe. Both are very delicious. Now it totally depends on you to choose which one of both recipes you prefer to work with, especially when it comes to difficulty. I can’t decide that for you, lol😀. I know that some people prefer butter based cakes to oil based cakes, and there are other people who prefer oil-based cakes to butter-based cakes. See? It’s up to you.
This recipe gives me that ‘feel’, the particular result I want- texture, color, taste. My oil-based red velvet cake recipe is a bit denser than this one so if you’re looking for a very light and spongy red velvet cake recipe, you’re right here!
Red-velvet cake is not just any cake dyed red. NO! The combination of vinegar, cocoa powder and buttermilk in the right proportions is what results in that velvety texture of the finished product. I found the right proportion, and I’m glad to share it with you.
You need:
200g butter
1/4 cup vegetable oil
350g sugar
300g flour
3 medium eggs (about 150g)
1 tablespoon cocoa powder(10g)
1 teaspoon baking powder
1/2 teaspoon baking soda
1/2 teaspoon salt
½ cup buttermilk
1 teaspoon vinegar
½ tablespoon red liquid food color(I used red velvet color)
1 tablespoon vanilla flavor
Method:
✓ Prepare two 6-inch pans by greasing with butter or margarine and lining with baking paper. Also separate the egg whites from the yolks. In another bowl sift the flour, and mix together with the baking powder, baking soda, cocoa powder and salt.
✓ Using the whisk attachment of your mixer, cream the butter lightly about a minute then add the sugar and continue creaming until it softens and the mixture turns pale.
✓ Add the oil and continue creaming until it appears risen in volume.
✓ Add the egg yolks and mix together.
✓ Add the buttermilk and mix it in.
✓Add the vanilla flavor, red food coloring and also mix in. At this point you can switch on your oven to preheat.
✓ Add the flour in three batches and mix in.
Adding red food color in the first picture and adding vanilla flavor in the third picture.
✓ Switch to the paddle attachment, or you can continue the mixing with a spatula. (I did continue with a spatula)
✓ Whisk the egg whites until stiff. Then fold into the mixture in three batches.
✓Add the vinegar.
✓ Divide the batter among the prepared pans. Tap the pans lightly on the table to release air bubbles. Then put into the oven to bake. You know it’s ready when you insert a toothpick in the center and it comes out clean.
Beautiful, isn’t it? You can see the toothpick hole in the center 😀A closer look . Can you see the velvety-looking texture already?😁Red velvet cake proudly lying in between chocolate and vanilla cakes 😘
I named these cupcakes after my daughter Dodo because she came up with the idea of making the mini-version of the cupcakes I regularly put in their snack bags to take to school. Their schoolmates love it so much and some are willing to pay to have some. They’re so delicious and rich. They can also make a perfect base for muffins- mix in grated carrots, coconut, raisins, any fruit of your choice. And they’re so easy to make. Great to snack on while you grab a book to read.
I USED:
300g flour
150g sugar
2 eggs
1/2tsp salt
1/2tbsp baking powder
1cup milk
3/4cup vegetable oil
1tbsp lemon juice + zest(optional)
1/2tbsp vanilla flavor
[makes 24 mini cupcakes]
METHOD:
~Separate egg whites from the yolks.
~Beat the yolks with the sugar until pale.
~Add vegetable oil and continue beating until smooth.
~Add salt and milk. Beat lightly and stop.
~Sift flour together with baking powder in a separate bowl then add to the liquid mixture. Mix with a spatula.
~Add vanilla flavor, lemon juice and a little zest if using. It should look like in the picture.(I did not use any lemon in this)
~Beat the egg whites until stiff.
~Gently fold into the batter, about two to three batches.
~Grease muffin pans with butter or margarine and dust with flour.
~Scoop a tablespoon each into the tins.
~Bake in preheated oven for 15 to 20 minutes or until firm on the top.
Would you try making these? Let me know how it turns out!
Beetroot is a popular unpopular healthy food. Filled with nutrients, almost all parts of this lovely root is edible and so nutritious.
When I saw beets for the first time, I was attracted by the color. The beautiful deep red hue it gives, I think it could be used as dye somewhat. However, I was disappointed when I tasted it the first time. I sincerely did not like the taste and the texture in my mouth. But with more research on the health benefits of this power-food, I was determined to create a recipe with beets that I would love.
With so many trials and error, I combined beets with potatoes, and boy! it was good.
The combination of beets and potatoes yields a whole new level of deliciousness.
So if you’re looking for a way to incorporate beets into your diet, I guarantee you this is it! This is the only way I can comfortably enjoy eating beetroot- beetroot warm salad.
I used:
2 beetroots
2 potatoes
Handful of green beans
4 eggs
1 carrot
Salt
For the dressing:
Mayonnaise
Olive oil
Vinegar
METHOD
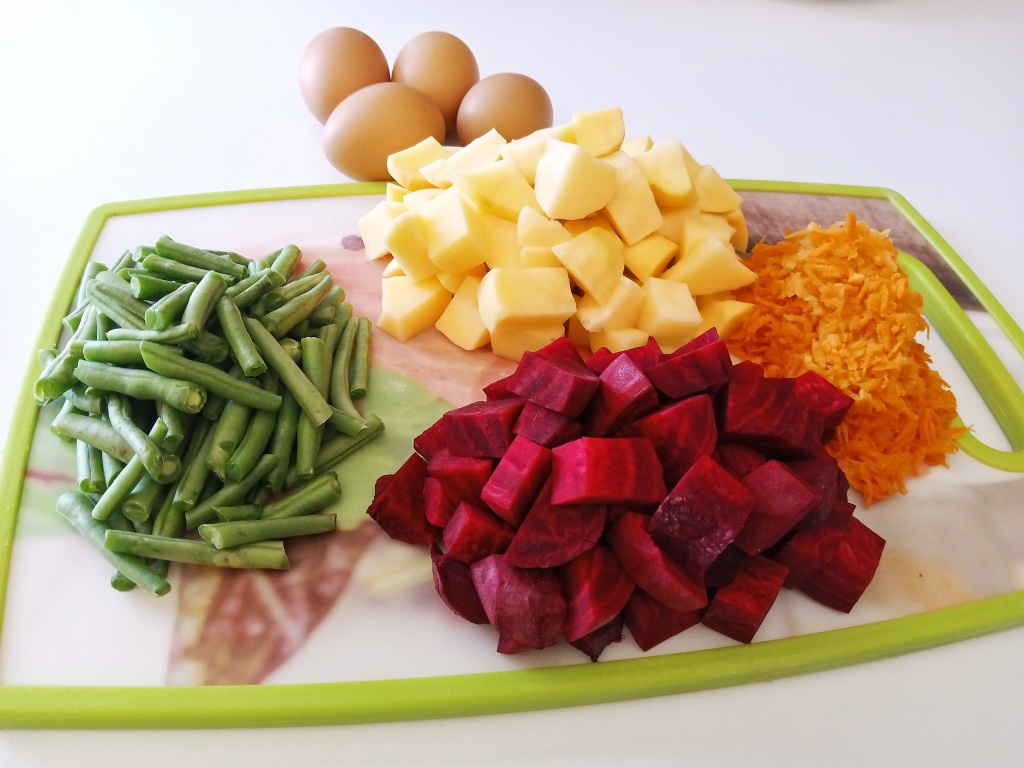
Prepare the ingredients. Wash properly and chop the potatoes and beets into cubes. Also cut the green beans in medium length and grate the carrots. Then set aside.
Boil the eggs and set aside. Cook the green beans and potatoes with little salt until just done, drain the water and set aside. Cook the beets separately in little amount of water until just done, drain the excess water and set aside. Peel the eggs.
Assemble the ingredients. See picture below
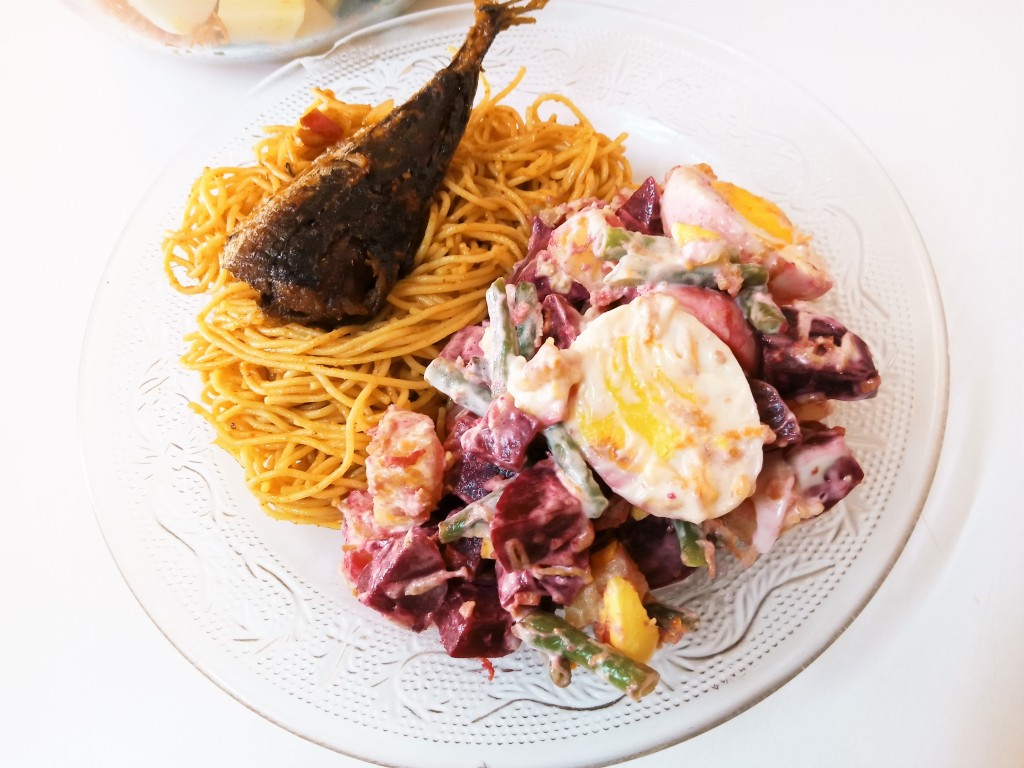
As you can see I cut the eggs in halves and quarts. And voila, it’s almost ready!
Prepare the dressing. Mix some mayonnaise, olive oil and vinegar together until a smooth consistency. Drizzle over your salad and enjoy.
In this salad I used just mayonnaise, so feel free to use any dressing of your choice. I promise you’ll love it.
And not to forget, I served mine as a side with some jollof spaghetti and fried mackerel fish for lunch, just the way I like it. Sometimes I have this salad for dinner and it’s a full meal not a side. Anyways, you’re good to go.
Hello friends, it’s been a long long time. How I’ve missed being here. I got a lot of things going on. But it’s good to be here again. Hope y’all are doing great! I get asked a lot of times about my oil-based cake recipe. I just realized I hadn’t shared it here before.
This cake tastes so delicious 😋 you don’t need any topping to go with it (all my cakes don’t need a topping, lol 😆). Just have it along with your favorite beverage for breakfast and you’re good.
So in a spirit to share one of my best recipes I need to do that now because it’s a must-try. Very easy, I would say, beginners level. Let’s hit the ground running..
I used:
250g(2 cups) all-purpose flour 150g(2/3 cup) sugar 2 large eggs (130g) 3/4 cup vegetable oil 1 teaspoon salt 1/2 tablespoon baking powder 1 cup milk 1 teaspoon each vanilla and condensed milk flavors
(Note : I used powdered milk in this recipe. Mix 3 tablespoons of powdered milk in 3/4cup water it gives you 1 cup of water. Also you may use any other flavors you prefer I used a 7inch round cake pan for this cake.)
Method:
– Prepare your baking pan. Grease with butter or margarine and line with baking paper or dust with some flour. -Preheat your oven. – In a bowl, whisk egg and sugar together until frothy. – Add oil and milk and keep whisking. – Add salt and the flavors. -In another bowl mix baking powder and flour. – Add flour mixture gradually and mix with a spatula. Mix until no lumps then stop. Don’t overmix! – Pour into prepared baking pan and bake for about 30 minutes or until a toothpick inserted into it comes out clean
Enjoy!!!
Will you try it? I’ll be excited to know how it turns out
First of all, I’d like to thank @PotsandPans for the tutorial on how to make homemade jam. This is just one recipe I’ve learnt during this Covid-19 lockdown. I’m making my stay-at-home count, lol!
I’ve always researched for a homemade recipe for jam and one thing had always put me off- I don’t have any idea about where I can get ‘pectin’ which is a much required ingredient. Add to my dilemma, I don’t even know what pectin is called in French(I live in a French country) and do not know how it looks like. So I had enough reason to give up. One day, I came across a free tutorial advert on @PotsandPans Facebook page. She promised to teach how to make jam at home. I jumped up at the opportunity (who doesn’t like freebies, lol). Something that captured my interest even more was the picture of the jam she made. I was impressed, so I was ready to learn this from her. She used grapes, and no pectin. Her jam was thick and delicious to look at.
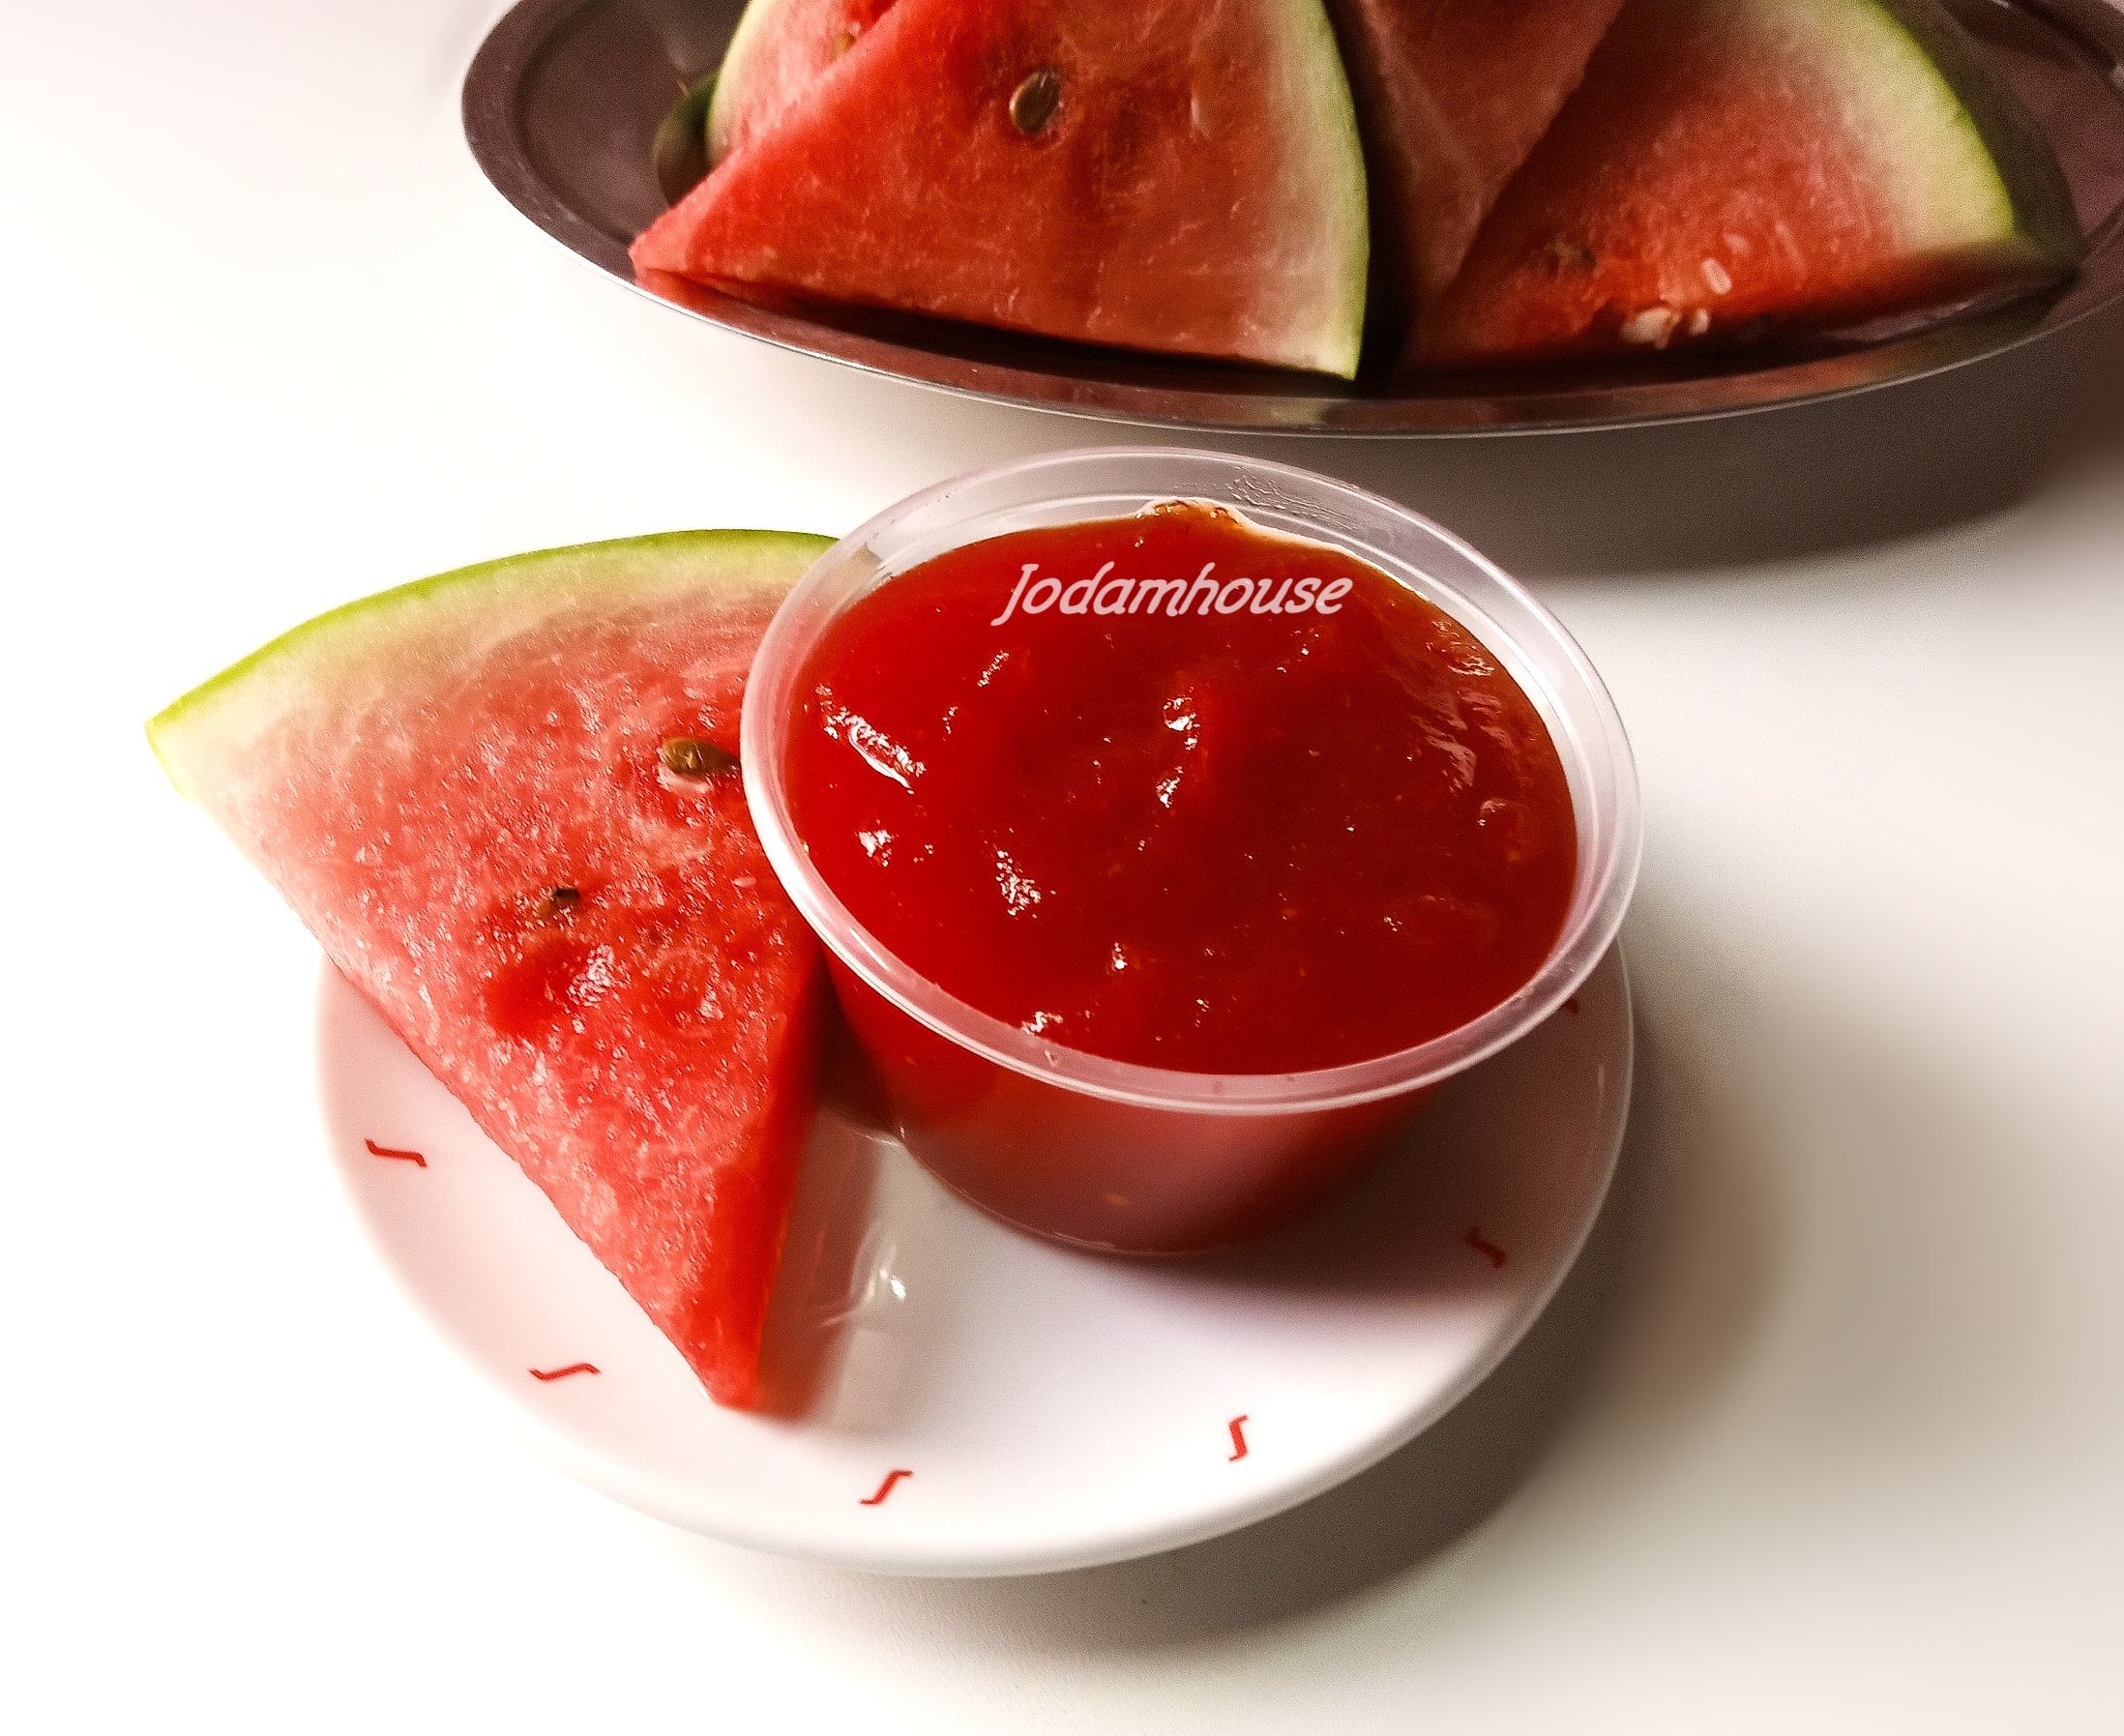
Several weeks later, I had extra watermelon that I needed to use up. I thought it would be a good idea to try making my own jam using watermelon. Way to go! The first time I tried it, I only chopped the watermelons. This was because I tried to imitate PotsandPans method. She didn’t blend the grapes. My resulting jam was nice, tasted delicious but my children and I didn’t like the watermelon chunks in it.
So I decided to try another time but with blended watermelons. At first I was scared because once after blending it looked like water. Aha! I thought it would never evaporate and thicken. But I said to myself, ‘have faith’😆. So the boiling began. I was excited to see the jam forming. Finally, a win! So here I’m excited to share this super simple recipe with y’all. Something you can do so easily.
I used:
600g watermelon (deseeded), 1/2cup or 130g sugar, 2tablespoons white vinegar
Method
>Blend the watermelon.
> Pour into a saucepan. Add the sugar and vinegar. Set over low to medium heat.
> Stir occasionally until it begins to boil. And continue stirring occasionally.
> You will notice that the water begins to evaporate and it begins to thicken.
>Reduce the heat and continue stirring. The jam is ready when you drag the laddle in it and it takes some time to cover up.
It takes some seconds to close up when you scoop it to one side
>Allow to cool and transfer to a bowl. You can refrigerate it for up to one month.
>Serve with your favorite snack. I like mine with doughnuts 😋.
When I first heard about Red Velvet Cake a few years ago, I thought it was just a red colored cake. It didn’t sound appealing to me because I’m not a fan of food colors. But I wondered what the meaning of the name ‘velvet’ could be for a cake. As I searched, I learned that Red-velvet cake has smoother, velvety crumbs unlike the ordinary cake. It fascinated me as I learnt that the ‘must have’ ingredients- vinegar and buttermilk- contribute to this. Also it seems according to many people that Red velvet cake was originally made with beetroot hence the red color. This appealed to me so I quickly experimented with that, making my first ever red velvet cake with beets. I loved it, my daughter loved it too. I cut some for her teacher and she loved it so much. She still remembers that cake. Unfortunately I didn’t take a picture of it😬. Continuing with my research, I understood that there is a reaction between vinegar and unprocessed cocoa powder which changes the color of the batter to a red hue. I was satisfied to know this. However in recent times, beets have been removed from the list of ingredients and red food coloring has been used for enhancing the red color of the cake. Also, reaction between vinegar and cocoa powder is no longer as effective because of the probably over-processed cocoa powders available today. With all these information, and still not being comfortable with the large quantity of ‘red’ coloring in a cake, I have developed my own red velvet cake using just a little quantity of red color; a teaspoon or even less works fine. I’m quite okay with this now because even though it’s dubbed ‘food’ color, it’s not food. It’s only accepted because it’s relatively not harmful when used in foods. So this is what initially put me off Red velvet cake. This recipe is one of my best. My son’s favorite, the only cake my husband eats comfortably without complaining about sugar, oh my family has given me the best reviews on this cake. Yay!💃
I have three different recipes for Red velvet cake-
1)oil-based
2)butter-based
3)with beets All taste amazing. And to say that the recipes are all so easy 😋. The cake can be frosted with any cream of your choice, but I love to eat it just like that. It is very moist and delicious.
Even my kids don’t want any frosting on it. See?😁. Stay tuned to my blog because I’m going to share all, one by one. I’m starting with the oil-based red velvet cake.
I used: 250g flour 1/2cup sugar 1/4teaspoon salt 1cup buttermilk 1/4cup cocoa powder 1tablespoon vinegar 1teaspoon baking powder 1/2 teaspoon baking soda 2/3cup oil 3medium eggs 1teaspoon red gel food coloring
Method >Preheat your oven to about 200°. Grease an 8inch pan and line with parchment paper. >Mix flour, salt, cocoa powder, baking powder and baking soda in a bowl.
>In another bowl whisk the eggs until it foams. Add sugar and continue whisking.
> Add buttermilk and whisk.
>Then oil (oops! I forgot to add my oil at this point. I added it at the end and the result was still same. That’s why I decided to share this particular making, to show you can’t go wrong with this recipe 😉). >Add the red food coloring and mix until all the gel dissolves.
>Add the vinegar and mix quickly. >Pour the flour mixture in about three batches into the egg mixture.
>Use a firm spatula to mix until all is incorporated and there are no lumps(it was at this point I remembered to add the oil 🤦).
>Pour the batter into the prepared baking pan.
>Bake in the oven for about 30minutes or until a toothpick inserted in the center comes out clean.
This will be my second pepper sauce recipe on this blog- I have several more to post. It is a special one for me because it’s so easy to prepare- you just have to chop up most of the ingredients. I pounded the garlic and ginger lightly and the fresh peppers. You can use any good vegetable oil of your choice.
This sauce is kid-friendly, it’s not so hot. You can reduce the quantity of the fresh peppers, either habanero or scotch bonnet. And it tastes so good.
It can be eaten with anything- rice, pasta, potatoes, yam, meat, fish, even bread 🍞. Yes, it’s that delicious. I actually had it with fried sweet potatoes and some bread, yum 😋.
I used:
Bell peppers,
Habanero peppers
Fresh tomatoes
Courgette
Onions
Ginger
Garlic
Spring onion
Salt
Vegetable oil
Red Bell peppers, red habanero peppers, fresh tomatoes, small courgette, spring onion, ginger, garlic and onion
(For the quantities the Bell peppers should be more, little fresh tomatoes, small courgette and little spring onion. Let the ginger, garlic and onion be according to your preference.)
Method
>Deseed the Bell peppers, wash and slice into long strands. Peel the onions, slice into rounds. Wash the tomatoes and chop.
>Peel the garlic and ginger and pound roughly. Wash the habanero peppers and pound also. You can use a food processor for this.
> Cut off the root of the spring onion then wash properly. Chop into pieces. Peel the courgette, wash and slice into long strands like the bell peppers.
>Heat some oil in a pot over low to medium heat. Add the ginger and garlic and stir. Fry for five to ten seconds then add the onions and continue frying. Stir until the edges begin to turn golden.
>Once you notice that the edges are beginning to turn golden add the chopped tomatoes and stir. Allow to simmer but stir occasionally until the liquid almost dries up.
>Add the habanero peppers and stir. Add the courgette and stir. Allow to simmer for about thirty seconds then add the chopped bell peppers. Add salt to taste, stir and add the chopped spring onions. Stir and allow to simmer for ten seconds then turn off the heat.
It’s ready, enjoy with any dish of your choice.
My bell pepper sauceserved with fried sweet potatoes, bread, cucumbers and oats for breakfast 😋
Hey guys, how are you all doing? Hope you’re keeping safe. Even though on lockdown, I’ve been keeping myself quite busy bonding with my entire family. I’ve had more time to get to know my children better. Yeah, really. Staying with them the whole time has made us much more than friends. I love them even more now. However I can’t wait for this whole Covid-19 drama to pass and everyone can get back to work or school 😆.
During this period I’ve tried my hands on so many recipes that I can think of. Here, I want to share a very quick one- carrot candy.
First of all I came up with this recipe at a time when I had so many carrots left. So I thought about coconut candy and said to myself ‘why not use carrots in place of the coconuts?’. My children love anything carrots. So when I announced that I would try making candies out of it they were eager to see how it will turn out.
So here we go, it was beautiful, and easy.
I used:
100g carrots
50g sugar
A small stem of mint leaves(for added flavor)
(Yielded 10 candies)
Method
>Shred the carrots and put into a saucepan.
>Add the sugar and mint leaves and begin to stir over low heat.
>Keep stirring until all the sugar dissolves and begins to caramelize. Then remove the stem of mint leaves.
>Stir a little bit more and turn off the heat.
>Allow to cool then with your clean hands mold to desired shapes.
I molded onto a toothpick for fun. I got 10candies. This makes 5g of sugar in each candy. One candy for a day.
Leave to cool completely and then it hardens more.
What do you call this snack? In Nigeria it’s commonly called Groundnuts. It is one of the most common street food. Growing up I loved eating roasted groundnuts so much, and still do. One thing however that deterred me from buying regularly by the roadside then was the method commonly used in roasting- sand. It’s supposed to be neat sharp sand, but who knew the sources of the sand used by those local groundnut sellers then? As a result I only usually bought from a friend whom I was somehow sure of her level of hygiene. Fast forward to several years later, I now live far away from home, with a new home, but I still love groundnuts so much. Living in an entirely different environment, Burkina Faso, I have seen that their method of roasting groundnuts is also totally different. They use a locally constructed drum-like oven specially made for roasting groundnuts. This oven is positioned over fire from firewood as the source of heat. There is a handle attached to it rotated manually to swirl around the drum where the groundnuts are put.
This is a great idea.
However, I wanted a simpler way to roast my groundnuts at home. I once met someone who said she roasts in garri (Nigerian food locally made from cassava). The first time I tried it, the result was awesome.
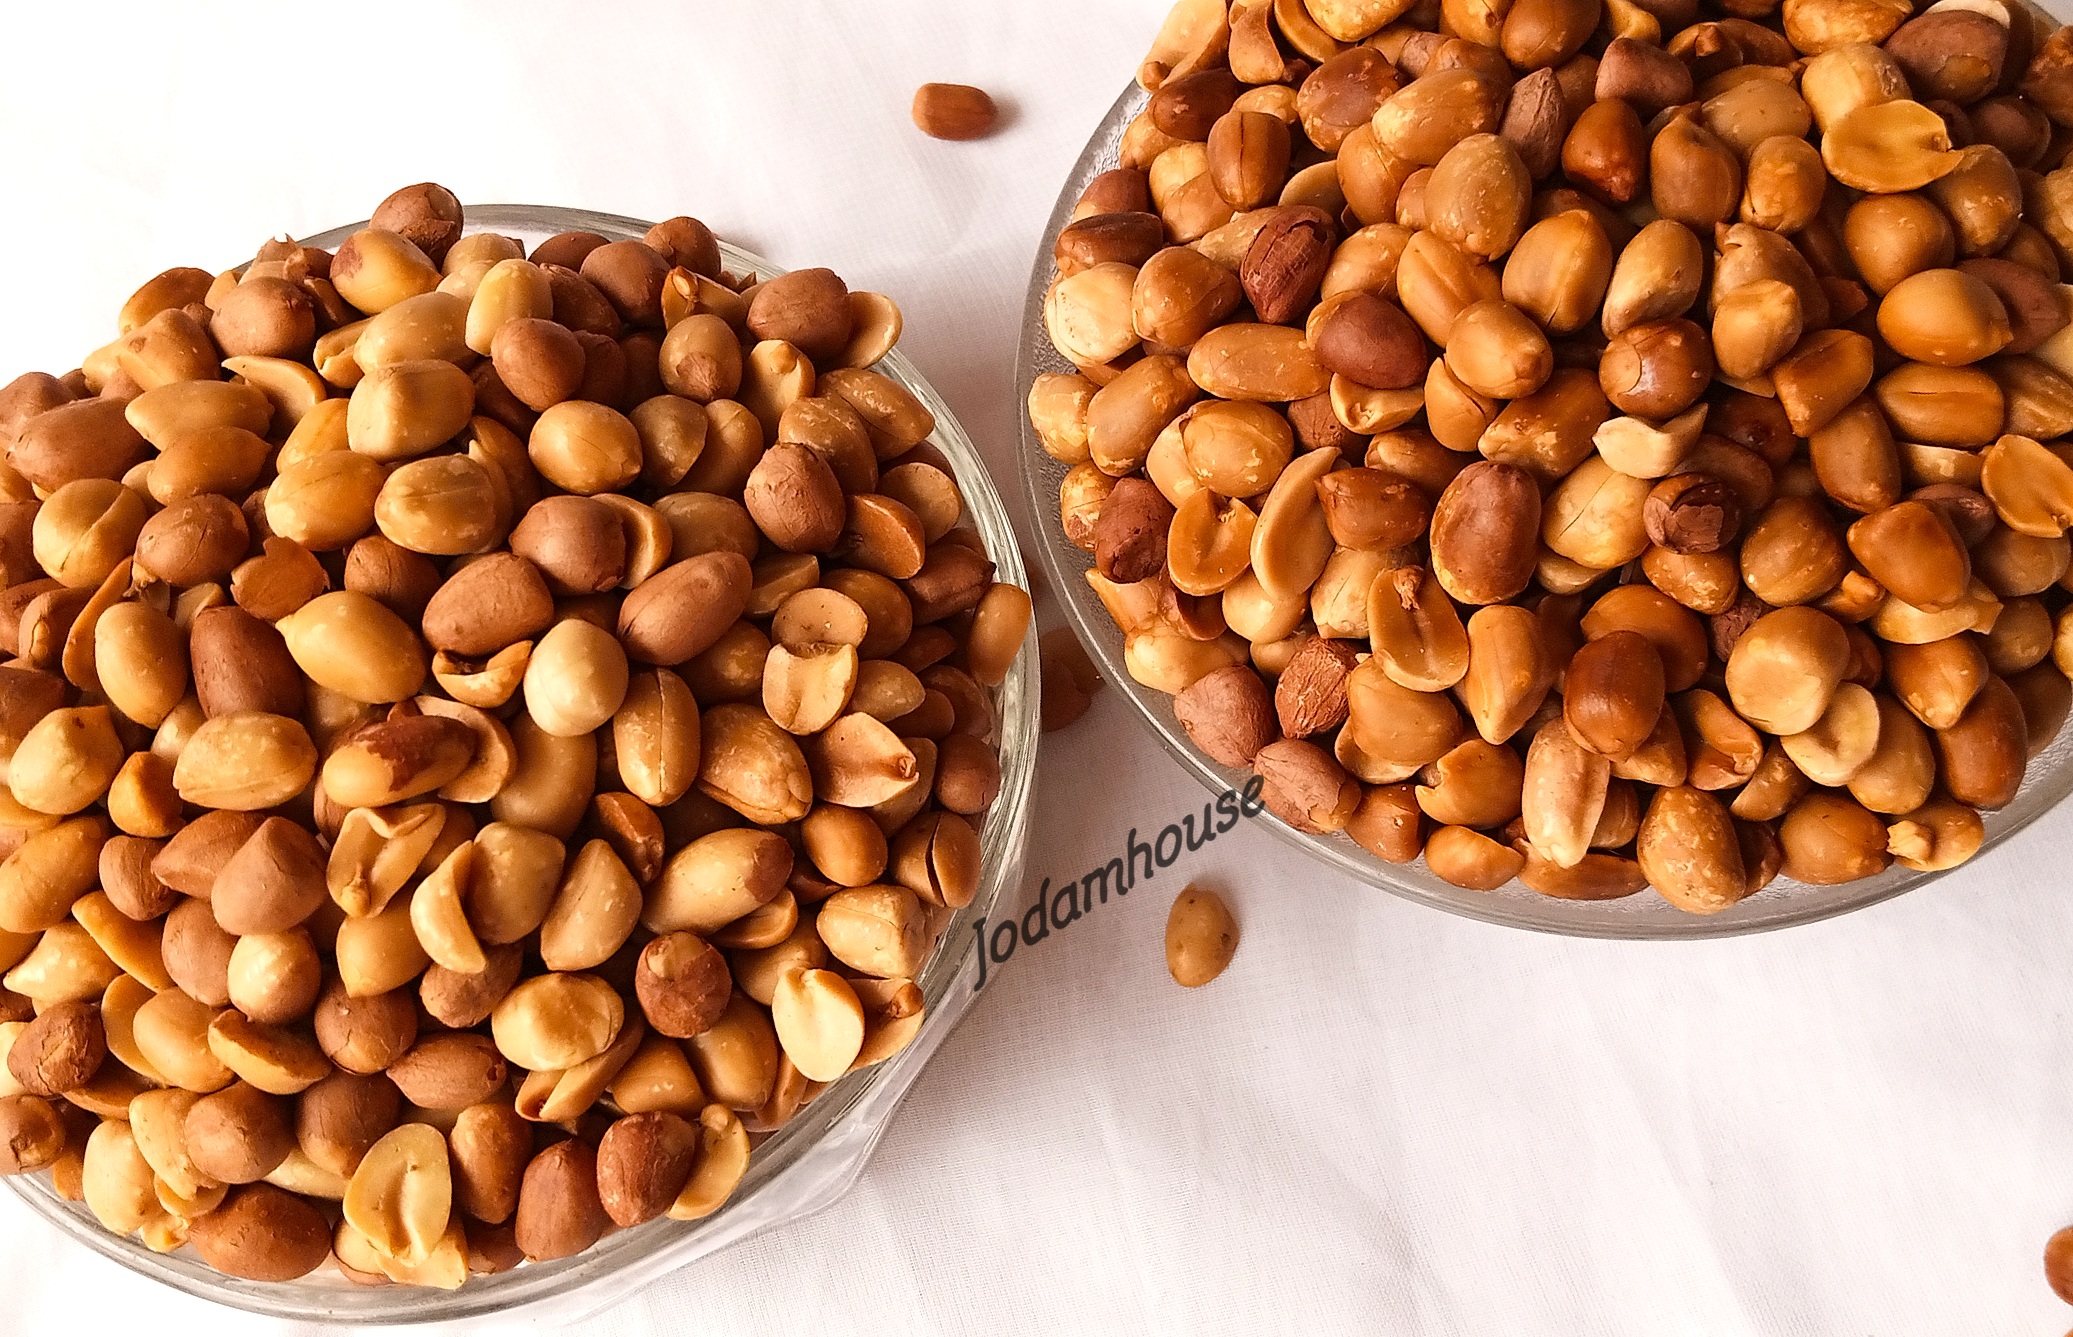
Groundnuts roasted in garri
But again I had a second thought because the garri used becomes waste. So I decided to try to roast them in the oven. I hit it. I’m so excited to be sharing these two methods today. Whichever method you prefer it’s all up to you. So my Nigerian friends in the diaspora, the oven roasting method is for you.
Groundnuts roasted in the oven
You need:
Groundnuts/Peanuts
Salt
Hot water
Garri/Oven
Method
Fresh groundnuts
>Prepare the groundnuts
Rinse the groundnuts in neat water and put in a bowl. Sprinkle enough salt and then add boiled water. The groundnuts will absorb some salt which will enhance it’s taste. Let sit for about 15minutes. Pour into a sieve to drain the water.
>
Sun-dry
Spread on a flat tray and dry under the sun.
>
I divided into two parts. One for the oven I spread on an oven tray. The other I put into a pot with garri. I preheated the oven before putting the one then reduced the heat of the oven to minimum. I also checked, stirring at intervals. The other one I had to stir constantly using minimal heat too.
>
15minutes later both are beginning to brown and become crisp. I remove from heat and pour out onto a cooler container to stop heating.
And both are ready. Very ready.
My husband and children are very happy because they love groundnuts so much too. Now we have it handy to eat with cucumbers and bananas. 😋
I hope you try this out too and let me know what you think.
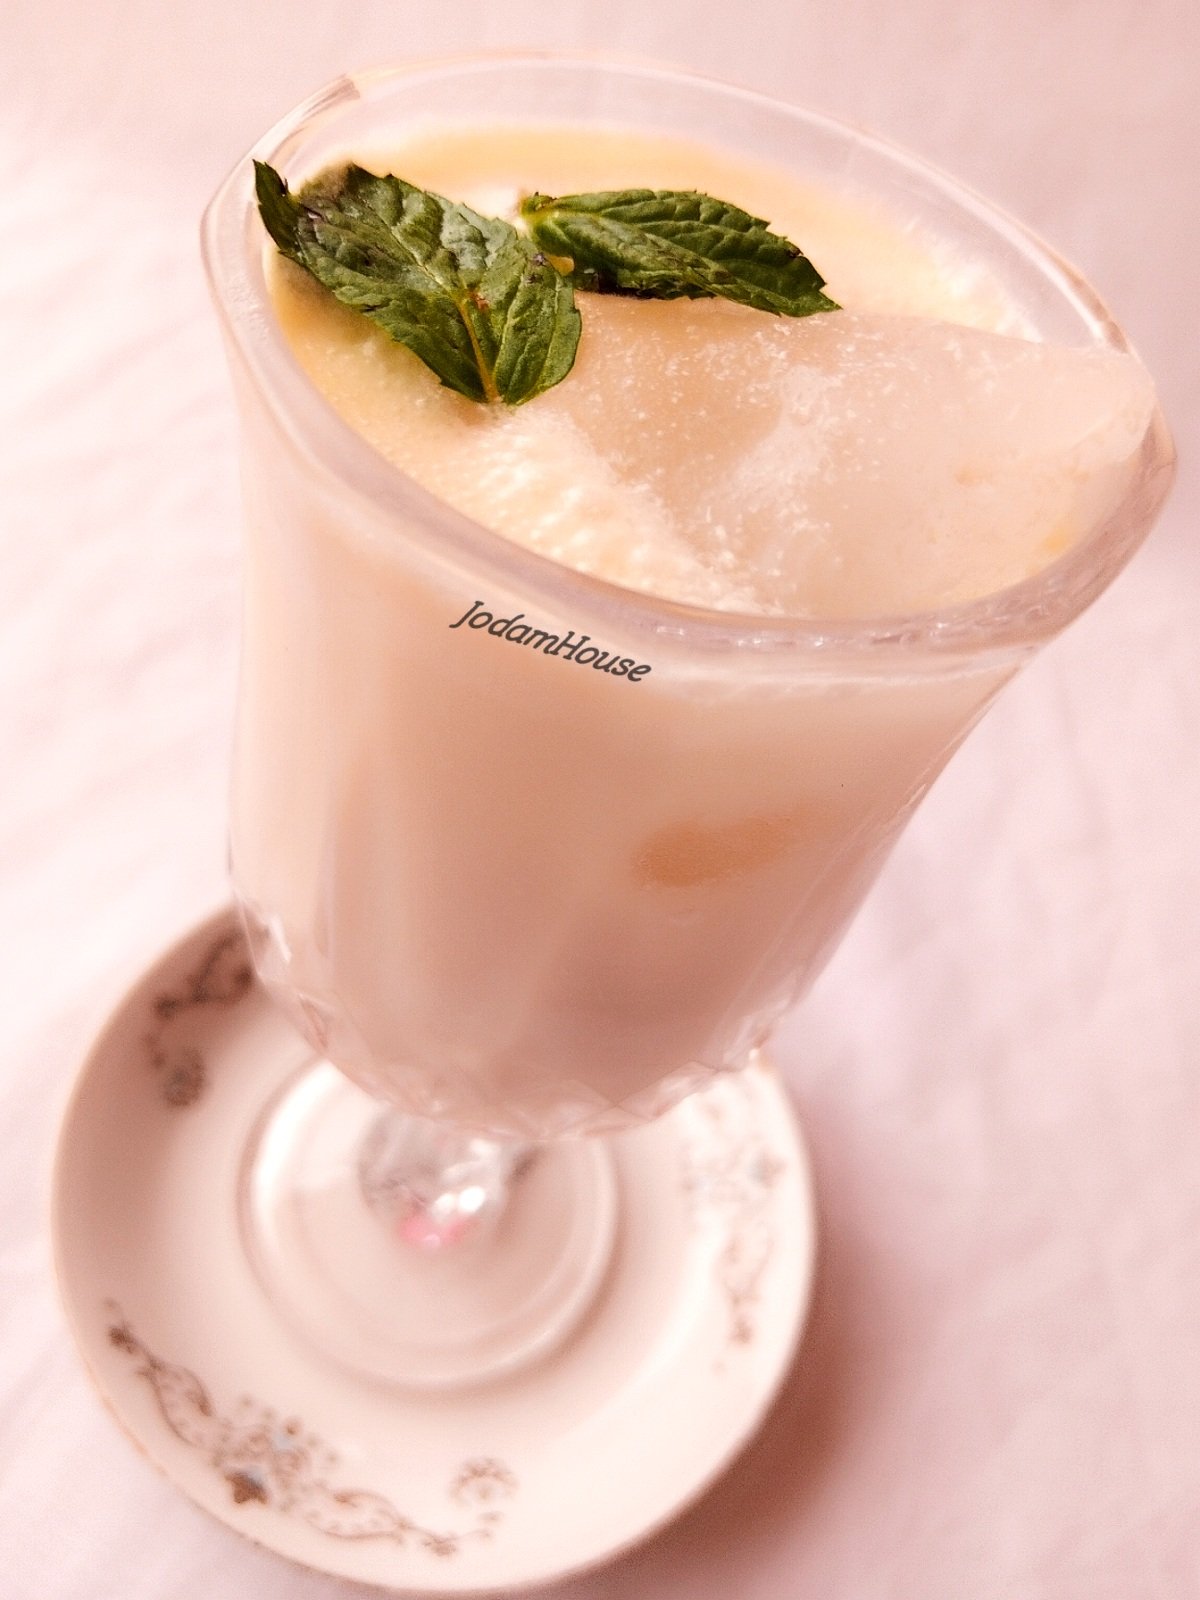
Popularly known as horchata in Burkina Faso, this drink made it’s way so easily to my heart the first time I tasted it. I later realized that it’s quite common in Nigeria, my home country but I was never opportuned to have a taste of it back home until I traveled miles away to Burkina Faso. Burkina Faso is a country with very hot climate for the most part of the year, no wonder natural drinks are common, so many.
Horchata was just one of the first to win my attention. Made with very simple plant based ingredients, with no added sugars makes this drink excellent for anyone seeking for a healthy option in drinks. Not to mention the numerous health benefits which is not within the scope of this article (you may wish to Google it to learn about the health benefits of horchata drink). And too, it is very refreshing. Trust me, you’ll sleep like a baby after having just a glass of chilled horchata after dinner. So good .
There are three basic ingredients required: Tigernuts, Coconut and Dates. Blend and extract the juice and that’s all. Here’s exactly how I made it:
I used: 1cup tigernuts 1cup dates 1coconut 1large finger of ginger (optional) 2litres water
Method: >Wash and soak the tigernuts in water for 24hours. This allows it to absorb some water, freshen up and easier to blend.
>When the tigernuts are ready, soak the dates for about 2hours to soften and make it easier to separate the seeds from the fruit. >Shred the coconut and peel the ginger. >Rewash the tigernuts because you want to get rid of all soil particles on it. Also separate the seeds from the date fruits and rewash.
>Put everything in the blender, add some water and blend until smooth. Pour into a sieve and stir with a wooden spoon to extract the juice. You may want to blend again twice or more after which you pour out and extract juice. I blended and extracted juice three times.
>Use a fine chiffon cloth and sieve again to remove tinier particles.
>Pour into containers and chill. Note: Consume within two days. And do not freeze. This drink is excellent at near-freezing temperatures.